
Creating Widgets in Edit Mode
Creating a Widget
In order to create a new widget, click and drag the image of the desired widget type off of the menu bar. When you begin dragging, the widget will expand to its full default size, and become semitransparent and colored. Simply drag the widget to its desired location, and release the mouse button when it's in place. A new widget of that type, with default settings, will appear where you dropped it, and a widget popup with its information will appear. The widget image will return to the menu bar, and you will be able to create another widget of that type.
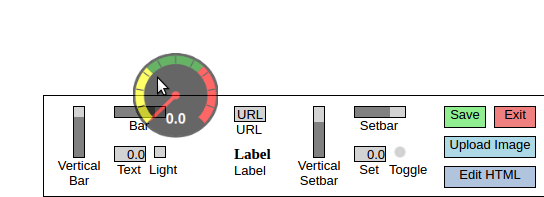
Some different widgets have similar-looking icons on the menu bar, so be sure to read the label of a widget before dragging it to ensure it's the widget you want.
The "Bar" and "Vertical Bar" widgets function identically, as do the "Setbar" and "Vertical Setbar" widgets. In fact, you can convert a vertical bar or setbar widget to a horizontal one, or vice versa, by changing its height and width. The separate options for vertical and horizontal bars and setbars are purely for your convenience.
Widget Placement
You can place widgets almost anywhere on the page, and the widget editing popup should adjust its location relative to the widget to ensure it never goes offscreen. There is one restriction on widget placement, however: do not place active widgets in the lower right-hand corner of the screen. This is because the lower right-hand corner of the screen houses the menu button, so when you try to interact with an active widget in that corner, you will instead bring up the menu button by mousing over it.
Changing Defaults
Each type of widget is created with its own set of default values for parameters to ensure it can be created and placed right away. You can edit any of the defaults for the widget in its popup. To change the size of a widget, edit its width and height values. Refer to the detailed documentation of specific widget types to see what parameter each field in the popup affects, and the default value for that field. Be sure to click the "Save" button in the popup when you're done making changes.
NOTE: Even if you don't change any of the widget's default settings, make sure to hit the "Save" button on the widget popup to ensure the widget is created in the file!