Graphical User Interface
Introduction
This document is a guide to using and creating Graphical User Interfaces (GUIs) for the Vesta monitoring and control system.
Terminology
There are several terms that have specific meanings in this document:
- GUI: Graphical User Interface. In this document, a web page that is live so that data is continuously updated. It may also allow user interaction, such as setting values or turning things on or off.
- Data Element: Any input, output, or variable in a Vesta unit.
- Widget: A graphical representation of an indicator light, gauge, bar graph or other object. Widgets are connected to Vesta data elements, and are placed on a background image to create a custom GUI.
Vesta Web Interfaces
Out of the box, Vesta provides a simple web-based user interface that's used to set up and program the system:

Figure 1: Standard Web Interface (Vantage & Pro: Classic is similar)
This interface allows creation of data elements, creation and editing of rules, monitoring of all inputs and outputs, and a variety of system management functions.
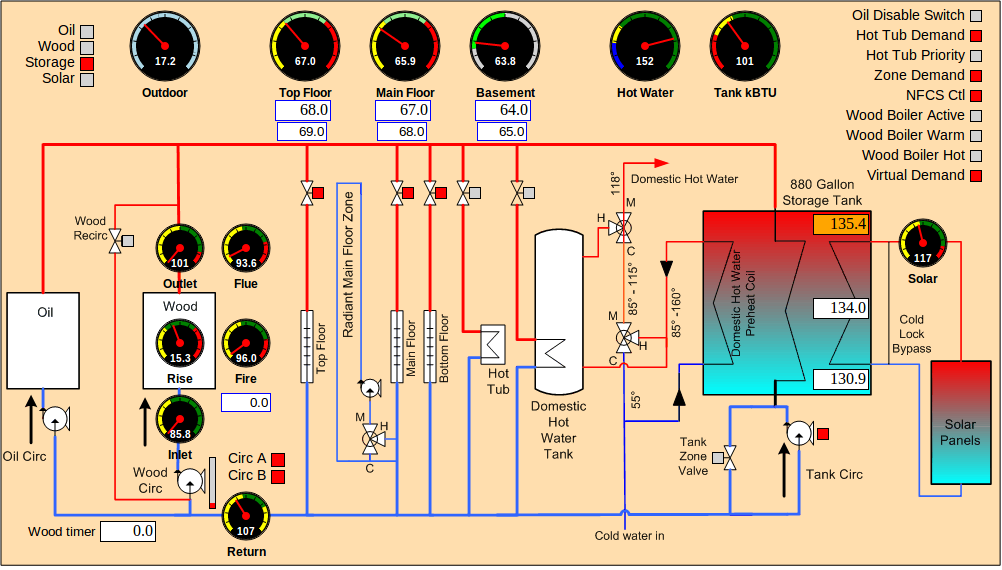
In addition to this simple web interface, the Vesta controller has the ability for users to create a customized graphical user interface (GUI) that's more relevant to their needs. This interface updates automatically and provides the ability to directly set Vesta internal elements (variables and outputs). The interface supports a variety of graphical elements (widgets) and allows them to be placed arbitrarily on an image background of the user's choice.

Figure 2: Custom Web Interface
In the example above, a variety of display widgets were placed on top of a system plumbing schematic.
By default, all widgets update every 5 seconds. That means that dial pointers move, digital displays refresh, and indicators change color automatically. This is done 'behind the scenes' so the page doesn't have to be refreshed.
In addition to real-time display, some widgets allow interaction. For instance, a widget can be defined which will set or toggle a discrete output on Vesta. A numeric display widget can also allow the value to be changed, and set an Vesta variable to the new value.
On newer Vestas, all widgets and other aspects of a custom GUI page can be easily maintained using Edit Mode. On older Vestas, creating and modifying this interface requires some familiarity with web pages and web server terminology.
Vesta Address Used In Examples
Throughout this document, examples assume that your controller is at the standard address of 192.168.1.8. Change as necessary to match your configuration.
